There are two questions that keep coming up in the
Etsy Forum help section, one is about how to take better pictures and the second is about those 4 tiny items on the etsy header. I was taking photos of an item for the
louchelust store today and I though it would be a good opportunity to make a photoshop tutorial for how to take a photo on a totally clear white background, those seem to appear in treasuries more and also, become candidate for "
knockout" items.
So here is goes: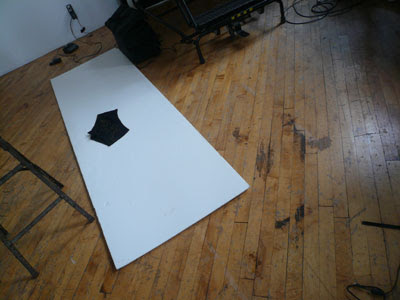
The most important thing is to start off with a good picture, even though there's a lot you can fix in photoshop, it's better and quicker if you start with a clear good shot. I used absolutely no artificial lighting to shoot those panties. I just shot next to the window and had beautiful natural light. To get a white background, I use
foam core. It's inexpensive and pretty solid, so you don't get wrinkles or strange shadows like you get when shooting on paper.
I take 6-7 photos of each possession of the item and choose the best one. This is the picture that I started with:
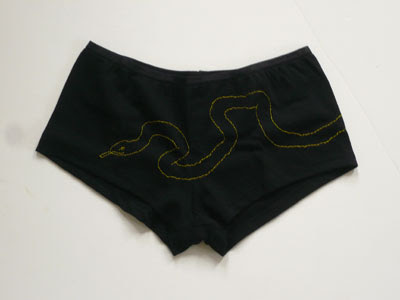
Not so bad - but as you can see, the background is not white and there are some spots that really shouldn't be there.
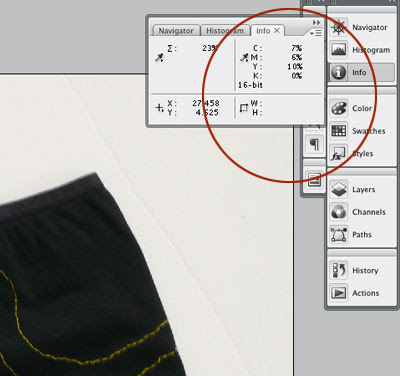
I use the "info" window to check the amount of color there is in the back ground. also the surface looks white, it's actually containing quite a lot of color: 7% cyan, 6% magenta and 10% yellow. in order to achieve clear white, those numbers should be all at 0. as you are working, go back to the info and check those numbers often - also, check in different parts of the image. In this photo for instance the numbers on the left side was higher (which means the background was darker).
So, I started working on it:
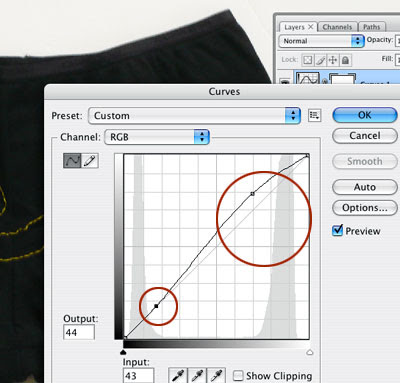
The first thing I did was ad an curve adjustment layer (from the layer>new adjustment layer>curve) when you begin working with this, a window open and a curve appear, I pushed the whites (the higher dot on the curve up to make the whites in the picture whiter. Also, I pushed the dark part of the curve down a bit to maintain the darker colors in the image and make it more contrast. Look at the picture while you do it and be gentle, if you do it too much you'll get a clear background but loose a lot of details in the photo.
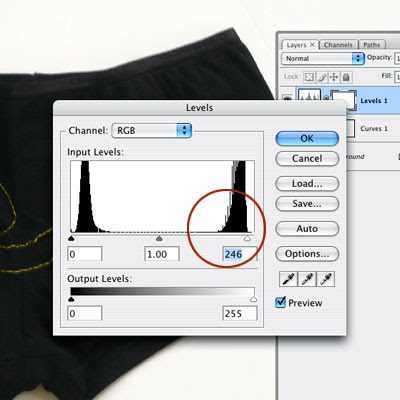
It was getting better but still I had some color in the background. So I added another adjustment layer - this time, using level (layers>new adjustment layer> levels) This leads to a window that looks like a histogram - look at the white side of the scale (on the right) as you can see, there's a small area where there's very little information, before the histogram start - that area is the pure whites. There's a little "noise" in it push the triangle till where the histogram actually start - again, if you do this too much you'll loose details, so be gentle...
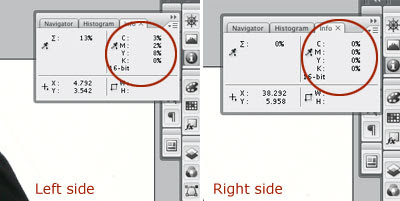
Remember before I started - the right side of the photo was lighter then the left?! so now, if I look at the numbers in the "info" window, I have total white on the right (woohoo!) and still a little bit of color on the left (3% cyan, 2% magenta, 8% yellow) so I still need to do some work. There are a lot of different ways to get rid of it, but this is what I chose to do in this case:
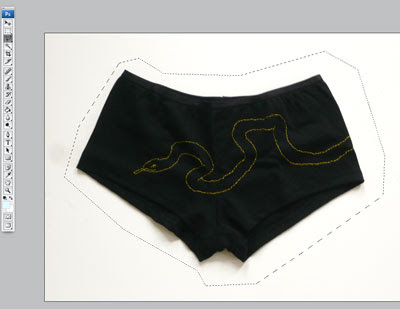
I loosely picked the outline leaving all the shadow of the item inside the selection - it what makes the photo looks real, and I didn't want to lose that.
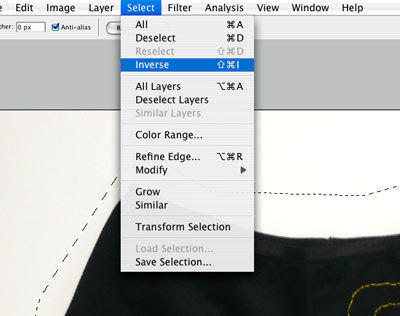
I inversed the selection (Select>inverse) to get only the background area picked and not the item.

I use the feather option to soften the harsh line of the selection, I chose 10 px, actually I could probably use 20 or 30 and it would work well, and even better but this is how I did it...
I press the delete button to erase the left over color on the background - pay attention to the layer you are on and don't accidentally delete a part of the adjustment layers - it will make the problem worse...

As you can see, there's still a little bit of a harsh line there, even with the feather. So I used a large eraser brush (choose the eraser tool and a large brush (I used the 200px for this). to soften up this line.
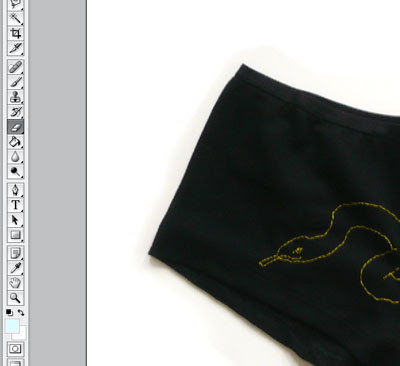
There - much much better!
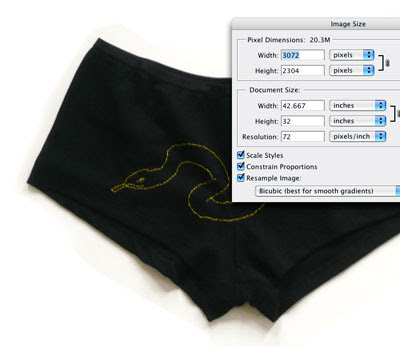
Last thing - resize the image. I always work on largest files possible - it allow more details to be included in the picture, and for me to have more options in working on the small details of it.
The most important thing to remember is subtleties, the first mistake people do in photoshop is to over do it, leading to a too bight, to saturated image that just look unreal and bad. always keep as much of the original photo information there, It would have been easier to just delete all the white to pure while in this case, but then the item would look like it's cut out of it's background. By keeping the original shadow, The item looks natural and good on the white background.
There are about 100 other ways to do this, but this is usually what works for me...